

Hey there! As a supplier of YVF frequency variable motors, I often get asked about how to replace the key components of these motors. It's a crucial skill for anyone using these motors, whether you're in a small workshop or a large industrial setting. In this blog, I'll walk you through the process step by step.
First off, let's talk about why you might need to replace key components. Over time, parts of a YVF frequency variable motor can wear out due to continuous use, overheating, or just plain old age. When this happens, replacing the faulty components can save you a ton of money compared to buying a brand - new motor.

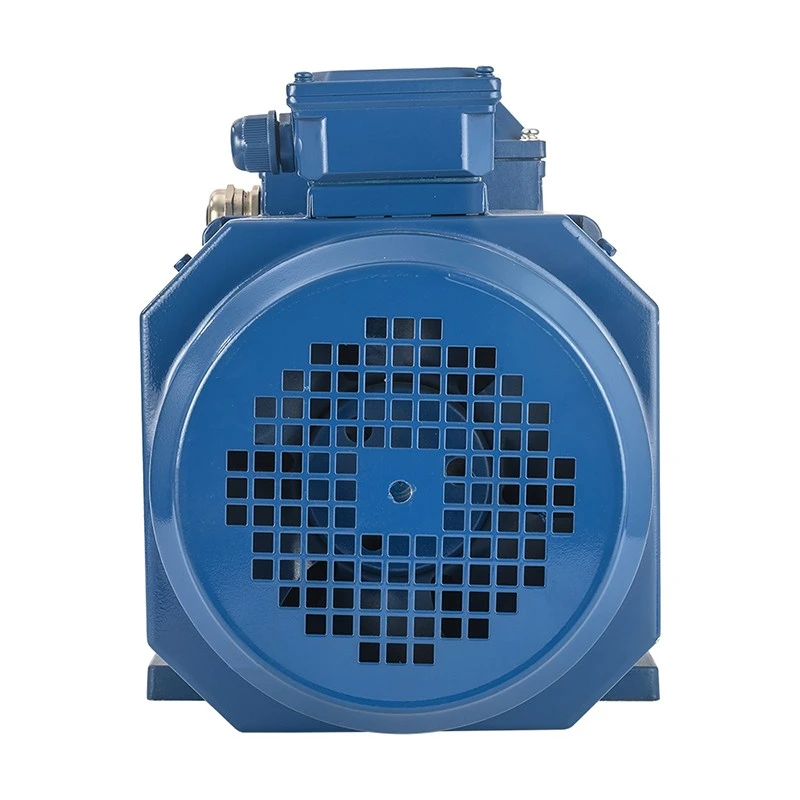
Understanding the Key Components
Before we start replacing anything, it's important to know what the key components of a YVF frequency variable motor are. The main parts include the stator, rotor, inverter, and the cooling fan.
The stator is the stationary part of the motor. It contains the coils that create a magnetic field when an electric current passes through them. The rotor, on the other hand, is the rotating part. It's designed to spin inside the magnetic field created by the stator, which is what makes the motor work.
The inverter is a super important component. It controls the speed and torque of the motor by changing the frequency and voltage of the electrical supply. You can check out our Inverter Adjustable 50Hz 60Hz Three Phase Motor to get a better idea of how the inverter works in a real - world scenario.
The cooling fan is also essential. Since these motors can generate a lot of heat, the fan helps to keep the temperature in check, preventing overheating and damage to other components.
Safety First!
Before you start working on the motor, safety should be your top priority. Make sure the motor is completely turned off and disconnected from the power source. You don't want to risk getting an electric shock! Also, wear appropriate safety gear like gloves and safety glasses.
Replacing the Inverter
The inverter is often one of the most common components that need replacing. Here's how you can do it:
- Remove the motor cover: Use a screwdriver to remove the screws holding the cover in place. Once the cover is off, you'll have access to the internal components of the motor.
- Locate the inverter: The inverter is usually a box - shaped component with a bunch of wires connected to it. Take a picture or make a diagram of how the wires are connected. This will make it easier to reconnect them later.
- Disconnect the wires: Carefully disconnect each wire from the inverter. Be gentle so you don't damage the wires or the connectors.
- Remove the inverter: There are usually a few bolts or screws holding the inverter in place. Remove these and take out the old inverter.
- Install the new inverter: Put the new inverter in the same place where the old one was. Secure it with the bolts or screws.
- Reconnect the wires: Use your picture or diagram to reconnect the wires to the new inverter. Make sure each wire is connected to the correct terminal.
- Replace the motor cover: Put the cover back on and secure it with the screws.
Replacing the Cooling Fan
The cooling fan can also wear out over time. Here's how to replace it:
- Access the fan: Depending on the motor design, you may need to remove some parts to get to the fan. This could involve removing the motor housing or a protective grille.
- Remove the old fan: The fan is usually attached to the motor shaft with a nut or a clip. Use the appropriate tool to remove it.
- Install the new fan: Put the new fan on the motor shaft and secure it with the nut or clip. Make sure it's properly aligned.
- Reassemble the motor: Put back any parts you removed to access the fan.
Replacing the Stator or Rotor
Replacing the stator or rotor is a bit more complicated and may require some technical expertise. If you're not confident, it's best to call in a professional. But if you're up for the challenge, here's a general overview:
- Disassemble the motor: Remove all the external parts like the end caps, bearings, and any other components that are in the way.
- Remove the stator or rotor: The stator is usually held in place by bolts or a press - fit. Use the right tools to remove it. The rotor may need to be carefully pulled out of the motor.
- Install the new part: Put the new stator or rotor in place. Make sure it's properly aligned and secured.
- Reassemble the motor: Put all the parts back together in the reverse order of disassembly.
Testing the Motor
Once you've replaced the components, it's time to test the motor. Reconnect it to the power source and turn it on. Listen for any strange noises or vibrations. Check if the motor is running at the correct speed and if the cooling fan is working properly.
If everything seems to be working fine, great! You've successfully replaced the key components of your YVF frequency variable motor.
Conclusion
Replacing the key components of a YVF frequency variable motor can be a bit of a challenge, but with the right knowledge and tools, it's definitely doable. Whether you need an Inverter Adjustable 50Hz 60Hz Three Phase Motor, a 2HP 5HP 10HP 20HP Variable Speed Electric Motor, or a YVF2 Frequency Control Three - phase Asynchronous Motor, we've got you covered.
If you're interested in purchasing any of our YVF frequency variable motors or need more information about component replacement, feel free to reach out to us for a procurement discussion. We're always happy to help!
References
- Electrical Motor Handbook
- Industrial Motor Maintenance Guide


